Optimiser WordPress est obligatoire si vous souhaitez que votre site web soit bien classé dans les moteurs de recherche et que vos visiteurs n’abandonnent pas leur navigation. Au nom de l’expérience utilisateur, Google accorde une importance cruciale au temps de chargement des pages web, ce qui a une incidence directe sur le classement dans les résultats de recherche de votre site internet. Pour vérifier les performances de votre site web, il existe plusieurs paramètres à prendre en compte : le temps de réponse du serveur, les ressources bloquant le rendu, les ressources de code non utilisées, le poids de la page ainsi que le poids des images.
Comment mesurer les performances de votre site WordPress ?
Pour mesurer ces paramètres et améliorer le SEO de votre site internet, plusieurs outils gratuits sont disponibles, le plus populaire étant PageSpeed car il y est développé par Google et a la particularité de mesurer aussi bien les performances sur ordinateurs de bureau que la vitesse de chargement d’un site à partir d’un appareil mobile. Pour ma part, je préfère utiliser GTmetrix car il donne beaucoup d’indications très précises et simples à suivre pour obtenir des temps de chargement plus rapides.
Les Core Web Vitals
Tous ces sites permettent de mesurer les performances des sites internet, mais surtout de donner des conseils et indications utiles pour améliorer la vitesse de chargement des pages, notamment en les comparant aux Core Web Vitals: il s’agit d’ensemble de mesures établies par Google. Les Core Web Vitals sont utilisées pour évaluer l’expérience des utilisateurs sur une page Web, et sont relatives au temps de chargement, à la réactivité et à l’interactivité d’un site internet. Ces Core Web Vitals se divisent 3 métriques principales:
- Largest Contentful Paint (LCP) : mesure les performances de chargement d’une page Web. Pour offrir une bonne expérience utilisateur, le LCP doit se produire dans les 2,5 secondes suivant le début du chargement de la page.
- First Input Delay (FID) : mesure la première impression de l’utilisateur sur l’interactivité et la réactivité de votre site. Il s’agit du délai entre la première interaction d’un utilisateur avec un élément de page (clic sur un lien par exemple) et le moment où commence le traitement en réponse à l’action de l’utilisateur. Pour offrir une bonne expérience utilisateur, les pages doivent avoir un délai de première entrée de 100 millisecondes ou moins.
- Cumulative Layout Shift (CLS) : mesure la stabilité visuelle. Google indique que les différents objets et éléments ne doivent pas se déplacer sur une page pendant son rendu et/ou son chargement pour un utilisateur. Pour offrir une bonne expérience utilisateur, les pages doivent avoir un CLS de 0,1 ou moins.
Important: sauvegardez votre site internet
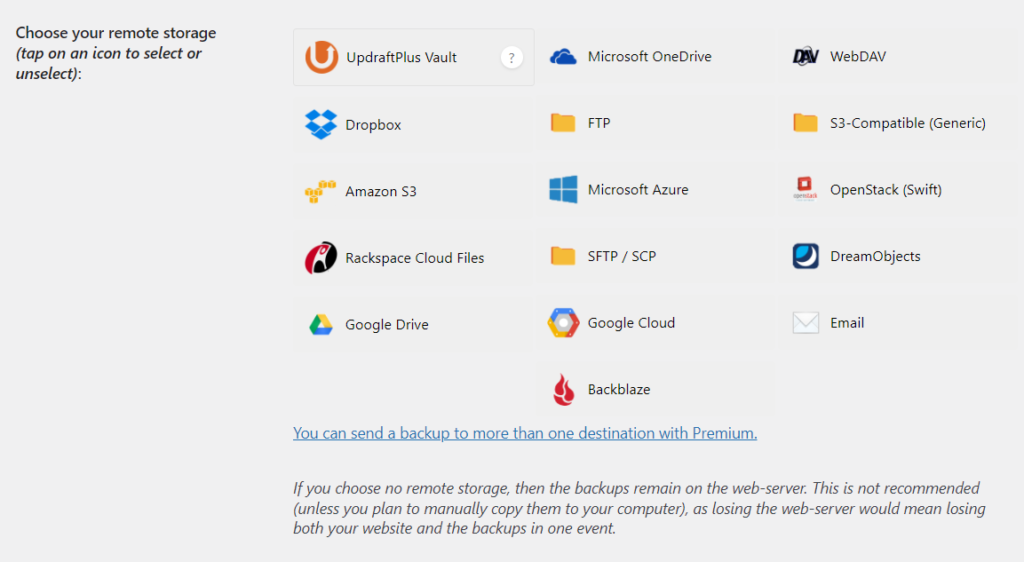
Il est fortement recommandé de sauvegarder votre site internet avent d’effectuer les optimisations suivantes. Vous pouvez utiliser pour cela:
- le plugin UpdraftPlus (consultez notre article détaillé sur UpdraftPlus ici),
- le plugin WPvivid (consultez notre article détaillé sur WPvivid ici).
1/ Installer un plugin de cache WordPress et de préchargement des pages web
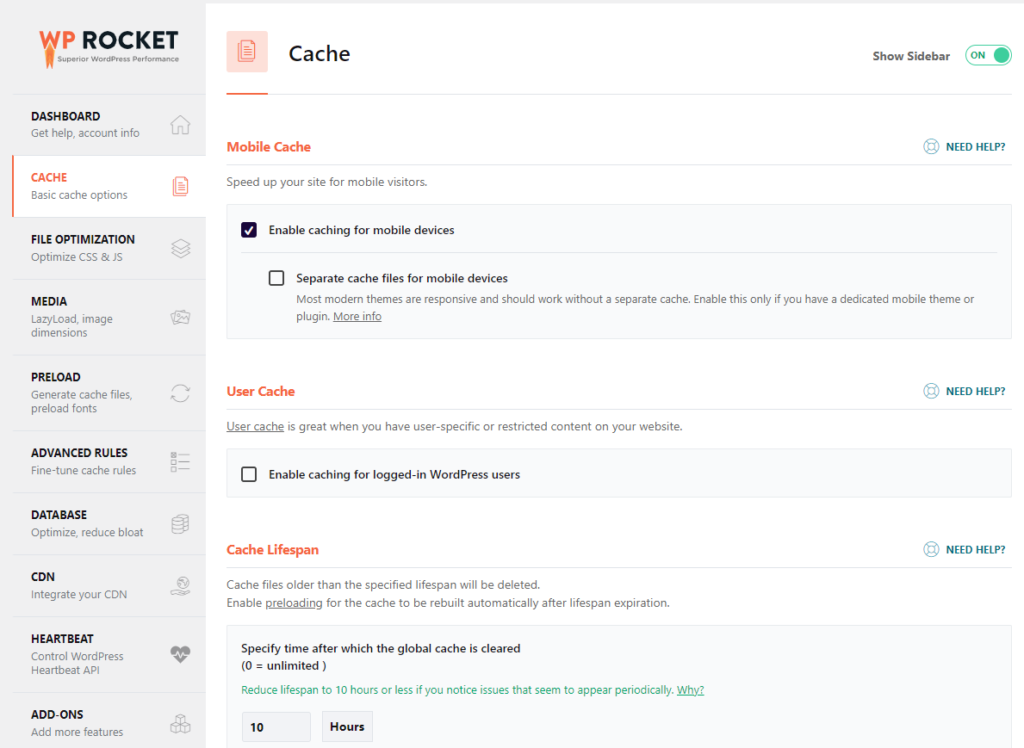
Une solution bien connue pour accélérer WordPress est d’installer un plugin de cache pour mettre en cache vos pages et vos articles. La mise en cache permet de créer des copies statiques de vos pages web et de les afficher aux visiteurs. Cette solution permettra de réduire le nombre de requêtes HTTP et d’améliorer les temps de chargement des pages web.
– Le plugin WP Rocket
WP Rocket est sans conteste l’un des plugins d’optimisation et de mise en cache les plus populaires sur le marché. Il n’y a pas de version gratuite, et sa version payante de base coûte 49 $ par an et permet l’optimisation de 1 site internet.
– Le plugin WP-Optimize
WP-Optimize est une solution tout-en-un pour accélérer un site WordPress et passer d’un site lent à un site rapide, en quelques clics seulement: ce plugin va vous aider à nettoyer votre base de données en effaçant des dizaines, voire des centaines ou des milliers de fichiers devenus inutiles. Wp-Optimize permet aussi compresser vos images et mettre en cache vos pages Web. Pensez à effectuer une sauvegarde de votre site internet au préalable!

2/ Utiliser un CDN (Réseau de Diffusion de Contenu)
Un CDN est un système de serveurs distribués qui diffuse des pages Web et d’autres contenus Web aux utilisateurs en fonction de leur emplacement géographique. L’objectif d’un CDN est d’améliorer les performances en fournissant du contenu à partir d’emplacements plus proches de l’utilisateur.
On peut imaginer un CDN comme un cache géant qui stocke des copies de contenu dans plusieurs endroits du globe. Lorsqu’un utilisateur demande un contenu mis en cache par le CDN, ce dernier répond à la demande à partir de l’emplacement le plus proche de l’utilisateur, ce qui améliore le temps de chargement de votre site wordpress.
Les CDN sont généralement utilisés pour fournir du contenu statique, comme des images, des feuilles de style et des fichiers JavaScript. Ils peuvent également être utilisés pour fournir du contenu dynamique, comme le streaming vidéo et audio, les diffusions en direct et les téléchargements de logiciels.
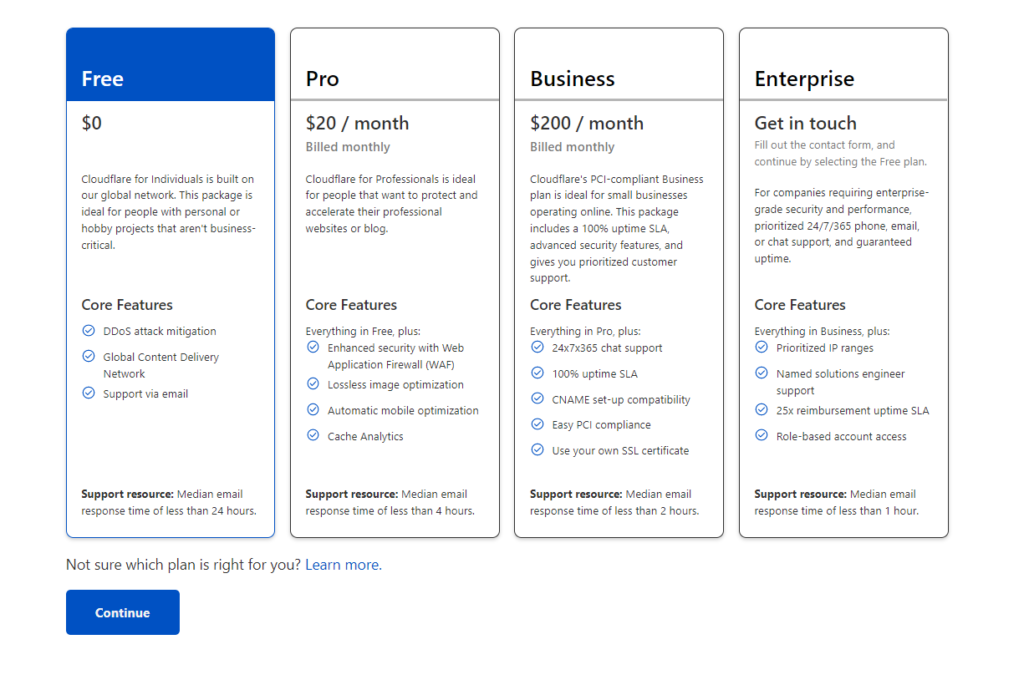
Le CDN le plus populaire est Cloudflare, et celui-ci propose un plan gratuit tout à fait satisfaisant pour la plupart des sites internet. Il est possible d’optimiser le cache pour votre site web en utilisant le plugin développé spécifiquement pour compléter le CDN Cloudflare: le plugin Super page Cache For Cloudflare.
3/ Optimiser les images et activer le Lazy Loading
Vous pouvez optimiser vos images en réduisant le poids des fichiers. Mais il est aussi possible de réduire la taille de vos images avant qu’elles ne s’affichent à l’écran, de façon à ce que le navigateur des visiteurs n’ait pas besoin de les redimensionner. Ces mesures simples augmenteront la vitesse d’affichage de votre site internet.
– Les plugins d’optimisation d’image
Il existe bien sûr de nombreux outils en ligne qui nous permettent d’uploader nos images en ligne, puis sur WordPress. Mais il s’agit alors d’un double effort qui peut prendre beaucoup de temps si nous travaillons avec un grand nombre de fichiers images.
Un optimiseur d’images WordPress tel que Imagify ou Optimole ou encore ShortPixel, non seulement compresse nos images lors du chargement, mais peut également effectuer une optimisation en bloc pour tous les fichiers déjà présents dans la médiathèque WordPress.
Autres avantages, ces plugins proposent en option leurs propres CDN, et peuvent fonctionner en synergie avec WP Rocket. Il est alors particulièrement efficace d’utiliser la fonctionnalité Lazy Loading.
– Activation du Lazy Loading de vos images
Il s’agit d’une technique simple et efficace qui permet de différer le chargement des images en les laissant hors écran jusqu’à ce que les utilisateurs aient besoin de les afficher. Ce même principe permet de différer l’affichage des iframes des vidéos. Cette technique est particulièrement utile pour accélérer le chargement des pages sur un dispositif mobile. Les plugins WordPress d’optimisation d’image qui viennent d’être cités prennent en compte cette fonctionnalité.
4/ Choisir le type d’hébergement Web qui vous convient le mieux
Comment accélérer votre site WordPress si vous utilisez déjà un CDN et un plugin de cache, et que vous avez pris soin d’optimiser vos images? La majorité des hébergements web sont des hébergements partagés. Mais il en existe d’autres types, Hostinger propose notamment l’hébergement Cloud, l’hébergement VPS, ou encore l’hébergement web WordPress managé.
L’hébergeur web Cloudways est quant à lui spécialisé, comme son nom le laisse deviner, dans l’hébergement Cloud tout en offrant des prestations similaires à un hébergement web WordPress managé.
Vous pouvez consulter nos articles sur l’hébergement Cloud, l’hébergement VPS, et l’hébergement web WordPress managé.

Une autre solution est d’utiliser Elementor Cloud. Le constructeur de pages Elementor est en effet construit sur la plateforme Google Cloud, ce qui constitue un gage de rapidité et de fiabilité. L’offre Cloud est un service tout-en-un qui permet de prendre en charge non seulement l’hébergement web mais aussi les aspects techniques de la création d’un site Web:
- Hébergement web entièrement géré par Elementor,
- Elementor Cloud vous permet de gérer votre site Web à partir d’une seule plateforme,
- Vous bénéficier de la licence Elementor Pro,
- Un domaine gratuit avec un certificat SSL gratuit,
- WordPress et Elementor préinstallés,
- Thème WordPress Hello activé,
- Sauvegardes quotidiennes et automatiques de votre site internet,
- Optimisation par le CDN Cloudflare,
- Un excellent service d’assistance.
Elementor Cloud peut ainsi être un excellent choix si vous n’aimez pas les aspects techniques d’un site internet et voulez au contraire vous concentrer sur la conception des pages web, d’autant plus qu’il ne coûte que 99$ par an, ce qui constitue un prix très correct vu l’ensemble des prestations proposées.

5/ Supprimer les plugins et thèmes WordPress inutiles
Comment optimiser la vitesse de votre site web gratuitement et simplement ? Il suffit de constater la chose suivante: plus vous avez de thèmes et plugins, plus ceux-ci sont susceptibles de ralentir votre site internet. Réduisez au minimum l’utilisation de plugins, en particulier ceux qui ajoutent du code inutile ou effectuent des requêtes HTTP supplémentaires (sauf bien sûr si vous avez une dépendance émotionnelle pour le plugin Hello Dolly). Si vous n’êtes pas sûrs, commencez par simplement désactiver (provisoirement) le plugin qui vous semble inutile.
6/ Mettre à jour les plugins et thèmes WordPress
Il convient de mettre à jour vos thèmes et plugins, le plus simple étant d’activer la mise à jour automatique pour chaque thème et chaque plugin WordPress. Enfin, maintenez votre installation WordPress à jour avec la dernière version.
7/ Mettre à jour de la version PHP pour accélérer WordPress
Tout comme vous mettez à jour WordPress lui-même pour vous assurer que vous êtes protégé contre les vulnérabilités de sécurité, vous devriez faire la même chose avec PHP. Ce n’est pas seulement une question d’amélioration des performances de votre serveur, mais aussi une question de sécurité. Avant de mettre à jour votre version PHP, vérifiez d’abord si votre hébergeur web préconise une version de PHP.
8/ Minification des fichiers CSS, HTML et JavaScript
La minification est le processus de suppression des données inutiles des fichiers de code HTML, CSS ou JavaScript de vos pages web, afin de diminuer la taille de ces fichiers, améliorant ainsi la vitesse de chargement des pages de votre site Internet.
Encore une fois, les plugins Wp Rocket et WP-Optimize peuvent régler ces problèmes très aisément.
9/ Utilisation d’un thème WordPress optimisé
– Le thème GeneratePress
Pour améliorer les performances de WordPress, le choix d’un thème est évidemment crucial. GeneratePress est particulièrement léger par rapport à ses concurrents, qui met donc l’accent sur la vitesse et la stabilité, ce qui est un facteur clé pour les performances de votre site web. Ce thème WordPress est facile à utiliser et est livré avec de nombreuses fonctionnalités qui le rendent parfait pour la création de tout type de site web. Il existe une version gratuite, ainsi qu’une version Premium offrant encore plus de possibilités de personnalisation (59 $ par an ou 249 $ Lifetime).
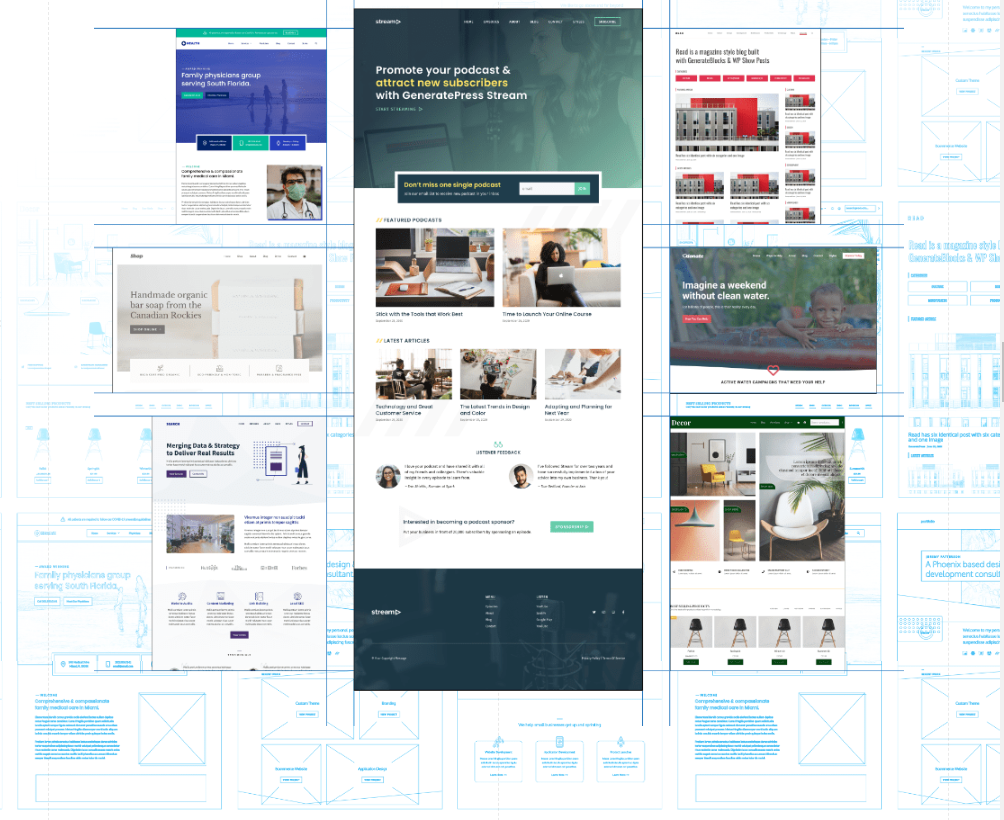
– Le thème OceanWP
Le thème OceanWP est un thème WordPress magnifique et moderne proposant plus de 200 modèles prêts à l’emploi, parfaits pour tout type de site web représentant une activité professionnelle (commerce, petite entreprise). Ce thème WordPress est rempli de fonctionnalités et d’options qui vous permettront de personnaliser et de contrôler facilement votre site web. OceanWP est livré avec un design responsive qui est superbe sur tout appareil, y compris les tablettes et les smartphones.
Le thème OceanWP est également prêt pour la traduction, de sorte que vous pouvez facilement créer un site web multilingue.
La version payante la moins chère du thème OceanWP coûte 35 $ et permet la gestion d’un total de 3 sites internets. Les forfaits sont annuels ou Lifetime. Grâce à un partenariat avec l’hébergeur web Cloudways, il est possible de déployer vos templates OceanWP en quelques clics. Vous pouvez visiter le site OceanWP ici.

10/ Réduire le nombre de redirections
Une façon de réduire le temps de chargement de vos pages est d’éviter au maximum d’utiliser des redirections. Pour cela, la solution la plus simple est d’utiliser un plugin de mise en cache. Un tel plugin mettra en cache vos pages et vos articles, et servira la version en cache aux visiteurs au lieu de les rediriger vers la page d’origine.
Une autre façon de réduire le nombre de redirections est d’éviter d’utiliser des raccourcisseurs d’URL, appelés encore raccourcisseurs de liens, tels que Bitly, Cuttly ou encore TinyUrl, car ceux-ci créent une redirection supplémentaire lorsqu’un utilisateur clique sur un lien raccourci par le biais de ces applications.
11/ Utiliser la compression GZIP
L’activation de la compression gzip dans WordPress réduit le temps de réponse du serveur et le volume des données envoyées par le serveur à un navigateur web, permettant une excellente performance de votre site WordPress .
Cette solution implique donc de modifier le fichier « .htaccess ». Cette action peut être effectuée soit manuellement, soit par un plugin, par exemple WP Rocket, Wp-Optimize, W3 Total Cache, ou encore Wp Fastest Cache: sur les serveurs web Apache ou LiteSpeed, ces plugins vont ajouter automatiquement des règles de compression gzip. La compression gzip est aussi disponible sur les serveurs web Nginx, en suivant cette procédure.
Il existe aussi la compression Brotli: successeur de gzip, elle est prise en charge par tous les principaux navigateurs web. Il s’agit d’un algorithme de compression de données sans perte qui est développé par Google. Ce format de compression devient de plus en plus populaire car il offre une meilleure compression que le gzip: les fichiers JavaScript compressés avec Brotli sont environ 15% plus petits, les fichiers HTML sont environ 20% plus petits, et les fichiers CSS sont environ 16% plus petits.
Vous pouvez vérifier que la compression gzip ou Brotli est bien activée sur votre site en consultant giftofspeed.com.
12/ Optimiser votre base de données WordPress
Il est fortement recommandé de sauvegarder la base de données avant de la manipuler. Une façon d’optimiser WordPress est d’utiliser un plugin comme WP-Optimize, Database Cleaner ou encore WP Rocket. Afin d’augmenter les performances de votre base de données et donc de rendre votre site plus rapide lors des requêtes des utilisateurs, ces plugins nettoient votre base de données en supprimant les données inutilisées, telles que les anciennes révisions d’articles, les commentaires mis à la poubelle et les options transitoires. En faisant cela, vous pouvez par ailleurs réduire la taille de votre base de données. Pour plus de détails, veuillez consulter notre article: 3 plugins pour optimiser votre base de données WordPress.
13/ Désactiver le hotlinking dans WordPress
Le hotlinking est l’acte d’utiliser la bande passante d’un autre site web en montrant l’un de ses fichiers (comme par exemple une image, une vidéo ou un fichier audio) sur un autre site web par le biais d’un lien web direct.
L’établissement de liens de type hotlinking peut représenter une énorme consommation de ressources pour le serveur cible, c’est-à-dire que ce peut être le cas pour VOTRE serveur. Vous pourriez ainsi passer de quelques centaines de requêtes par heure sur votre site à quelques centaines de milliers et cela pourrait même entraîner une suspension de votre compte d’hébergement web.
La plupart des fournisseurs de CDN tels que Cloudflare disposent d’une excellente protection contre le hotlinking, y compris si vous avez souscrit un plan gratuit. Vous pouvez également activer la protection contre le hotlinking sur votre serveur d’origine, que celui-ci fonctionne sous Apache ou sous NGINX, cette solution impliquant la modification du fichier « .htaccess » sur votre serveur web. Il existe encore d’autres solutions telles que l’inactivation du click droit sur vos pages internet, ou encore l’installation d’un plugin ad hoc. Vous pouvez consulter cet article détaillé du blog Kinsta.com.
14/ Augmenter le nombre de workers PHP
Pour optimiser WordPress, les workers PHP ont pour fonction principale de construire des pages et de traiter des tâches d’arrière-plan planifiées. Étant donné que les workers PHP sont directement responsables de la génération des pages HTML destinées aux visiteurs de votre site, ils déterminent le nombre de requêtes simultanées non mises en cache que votre site peut traiter dans un temps donné.
15/ Trop de polices d’écriture personnalisées
L’utilisation des polices personnalisées dans les thèmes WordPress est devenue habituelle. Il existe plusieurs librairies de polices, telles que Google Fonts, Typekit, ou encore Fonts.com. Mais celles-ci peuvent malheureusement ralentir considérablement votre site web. Afin de ne pas trop diminuer les performances du site internet, il est conseillé de ne modifier que la police qui vous intéresse, et non pas toutes les polices qui pourraient être disponibles pour votre thème WordPress. Plus d’informations dans cet article détaillé de GTmetrix pour optimiser WordPress.
Conclusion
Comme nous venons de le voir, de nombreux éléments très divers peuvent ralentir votre site web. Personne n’aime vraiment consulter un site web lent. C’est pourquoi Google prend en compte la rapidité d’affichage d’un site internet en tant que facteur de classement dans les résultats de recherche, ce qui pourrait donc vous pénaliser face à vos concurrents. Optimiser WordPress et accélérer votre site internet impliquent de nombreux petits changements qui, mis bout à bout, peuvent faire la différence.


